Deploy nginx With Helm
Installing the Bitnami standalone nginx web server Chart involves us using the helm install command.
A Helm Chart can be installed multiple times inside a Kubernetes cluster. This is because each installation of a Chart can be customized to suit a different purpose.
For this reason, you must supply a unique name for the installation, or ask Helm to generate a name for you.
helm install mywebserver bitnami/nginx
Once you run this command, the output will contain the information about the deployment status, revision, namespace, etc, similar to:
NAME: mywebserver
LAST DEPLOYED: Thu Jul 15 13:52:34 2021
NAMESPACE: default
STATUS: deployed
REVISION: 1
TEST SUITE: None
NOTES:
** Please be patient while the chart is being deployed **

NGINX can be accessed through the following DNS name from within your cluster:

    mywebserver-nginx.default.svc.cluster.local (port 80)

To access NGINX from outside the cluster, follow the steps below:

1. Get the NGINX URL by running these commands:

  NOTE: It may take a few minutes for the LoadBalancer IP to be available.
        Watch the status with: 'kubectl get svc --namespace default -w mywebserver-nginx'

    export SERVICE_PORT=$(kubectl get --namespace default -o jsonpath="{.spec.ports[0].port}" services mywebserver-nginx)
    export SERVICE_IP=$(kubectl get svc --namespace default mywebserver-nginx -o jsonpath='{.status.loadBalancer.ingress[0].ip}')
    echo "http://${SERVICE_IP}:${SERVICE_PORT}"
In order to review the underlying Kubernetes services, pods and deployments, run:
kubectl get deploy,po,svc
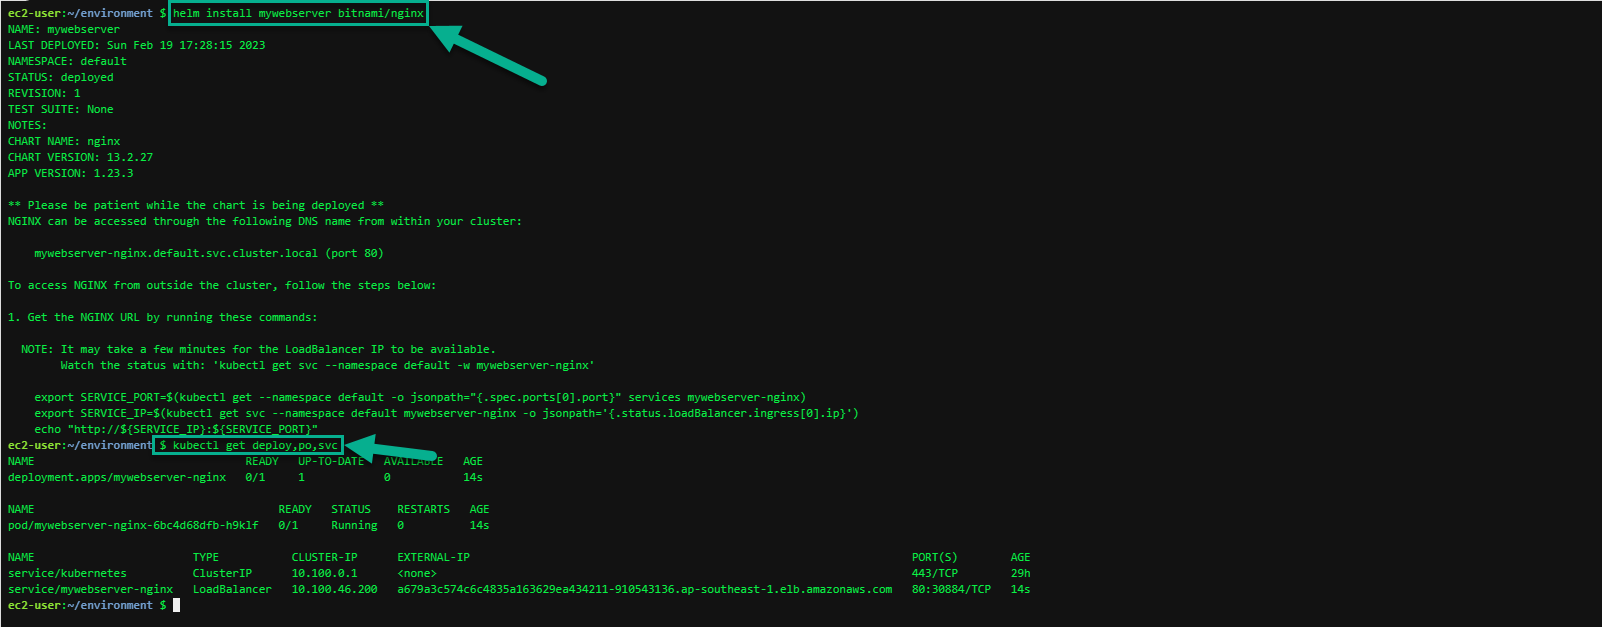
In the following kubectl command examples, it may take a minute or two for each of these objects’ DESIRED and CURRENT values to match; if they don’t match on the first try, wait a few seconds, and run the command again to check the status.
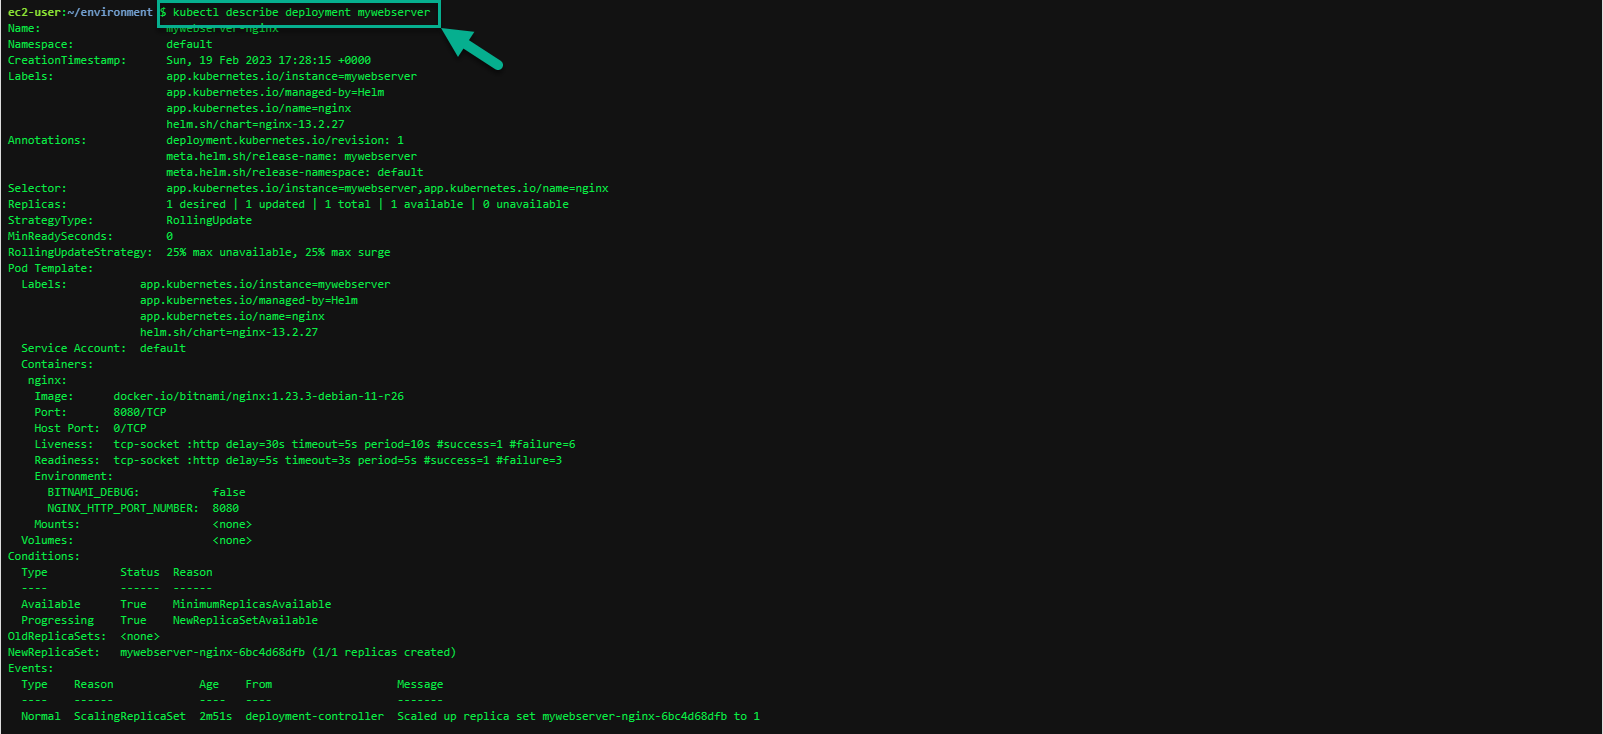
The first object shown in this output is a Deployment. A Deployment object manages rollouts (and rollbacks) of different versions of an application.
You can inspect this Deployment object in more detail by running the following command:
kubectl describe deployment mywebserver
The next object shown created by the Chart is a Pod. A Pod is a group of one or more containers.
To verify the Pod object was successfully deployed, we can run the following command:
kubectl get pods -l app.kubernetes.io/name=nginx

And you should see output similar to:
NAME                                 READY     STATUS    RESTARTS   AGE
mywebserver-nginx-85985c8466-tczst   1/1       Running   0          10s
The third object that this Chart creates for us is a Service. A Service enables us to contact this nginx web server from the Internet, via an Elastic Load Balancer (ELB).
To get the complete URL of this Service, run:
kubectl get service mywebserver-nginx -o wide

That should output something similar to:
NAME                TYPE           CLUSTER-IP      EXTERNAL-IP
mywebserver-nginx   LoadBalancer   10.100.223.99   abc123.amazonaws.com
Copy the value for EXTERNAL-IP, open a new tab in your web browser, and paste it in.
It may take a couple minutes for the ELB and its associated DNS name to become available; if you get an error, wait one minute, and hit reload.
When the Service does come online, you should see a welcome message similar to:
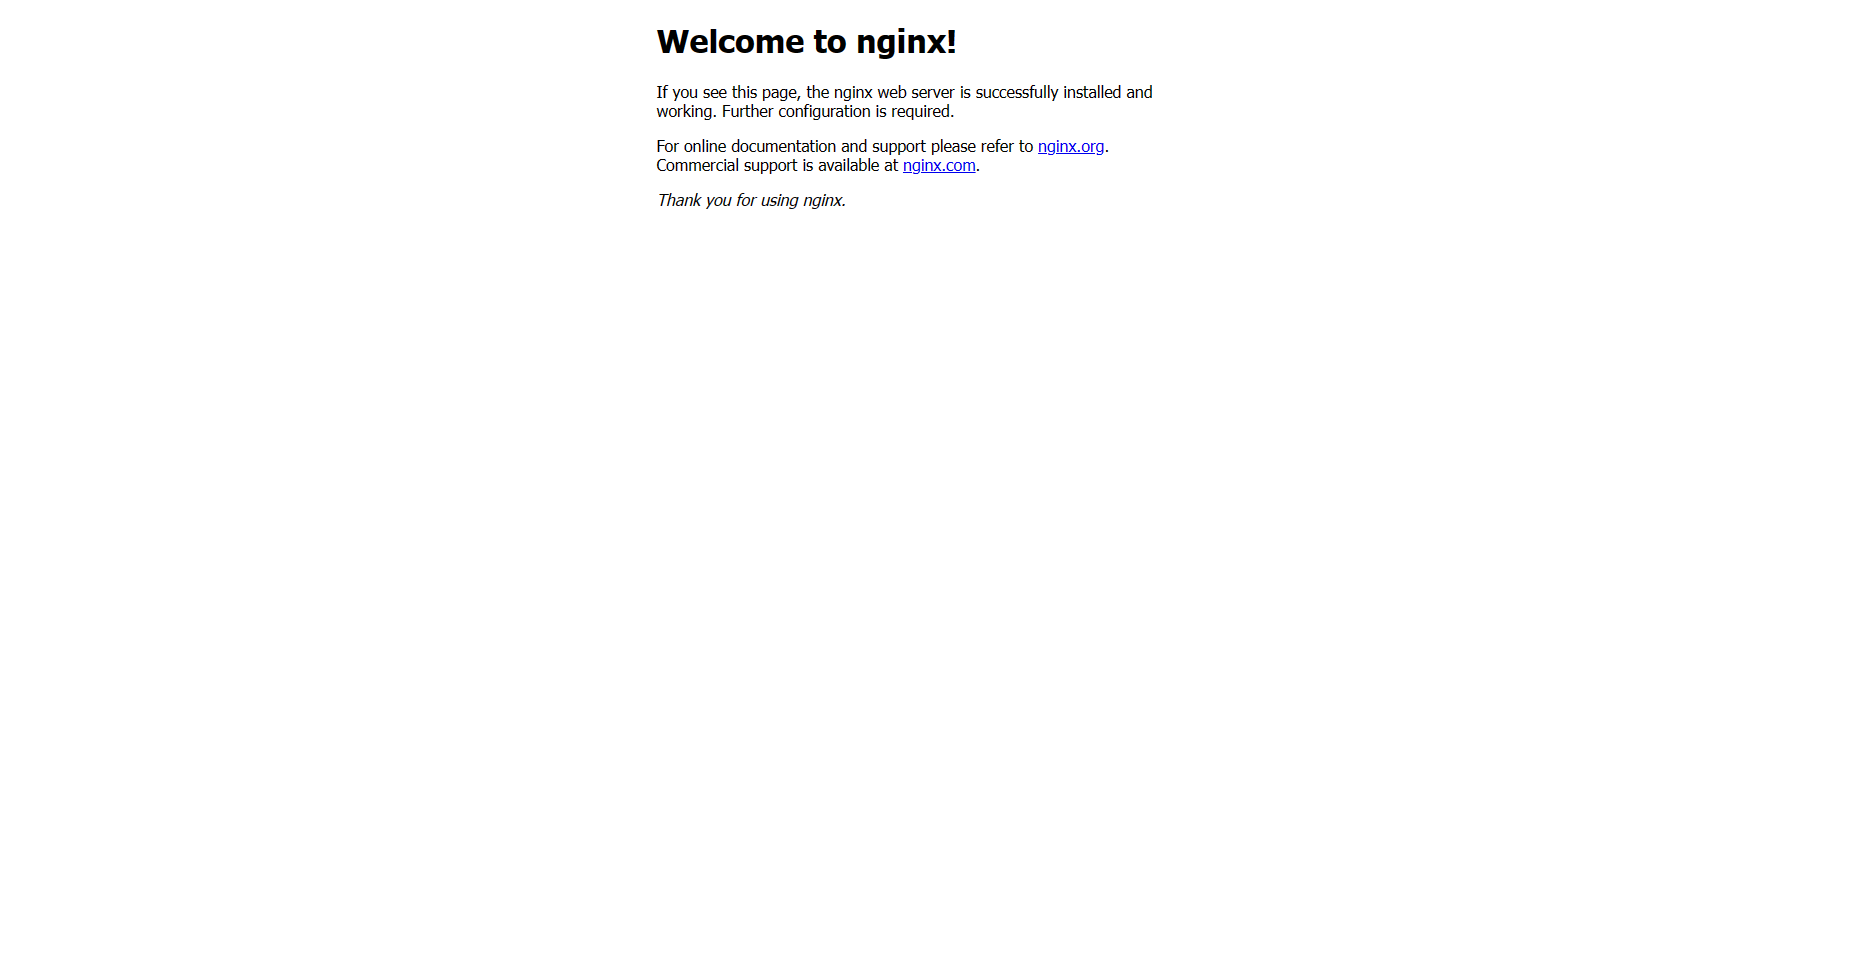
Congratulations! You’ve now successfully deployed the nginx standalone web server to your EKS cluster!